How to Build a Serial Frequency Generator and Oscilloscope with PyQt5, ESP32, and Arduino
As an embedded engineer, I enjoy creating real-time tools that simplify workflows. This project combines a Serial Frequency Generator and an Arduino Oscilloscope using PyQt5, ESP32, and Arduino, providing powerful tools for signal generation and visualization.
Project Overview
This project consists of two main applications:
1. Serial Frequency Generator
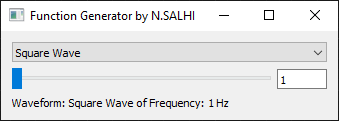
- Generates customizable signals, including adjustable frequency, waveform, and amplitude.
- Built with PyQt5, with an intuitive GUI for controlling an ESP32.
- Includes an onboard LED on the ESP32 for real-time visual feedback of the signal.

Screenshot of the Serial Frequency Generator application GUI.
2. Arduino Oscilloscope
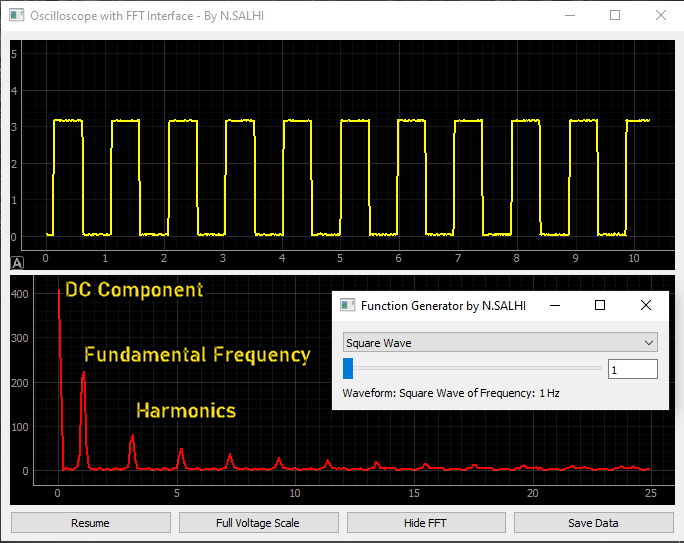
- Captures and displays real-time signals generated by the Serial Frequency Generator.
- Built with PyQt5, with an intuitive GUI for data visualization using an Arduino Uno.
- Provides engineers with an accessible tool for signal analysis.

Screenshot of the Arduino Oscilloscope application GUI.
Hardware Setup
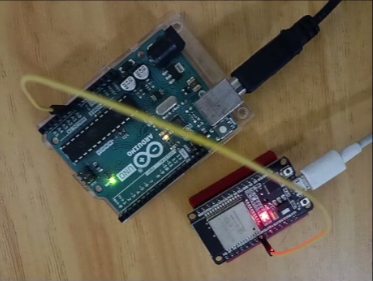
The hardware setup connects the ESP32 (for signal generation) and the Arduino Uno (for signal visualization) directly via jumper wires. This simple configuration bridges signal generation and analysis.

Live demonstration of the hardware setup for the project.
Features
- Real-Time Signal Generation and Analysis: Quickly generate and visualize signals for testing and debugging.
- Customizable Parameters: Modify signal frequency, amplitude, and waveform through an intuitive GUI.
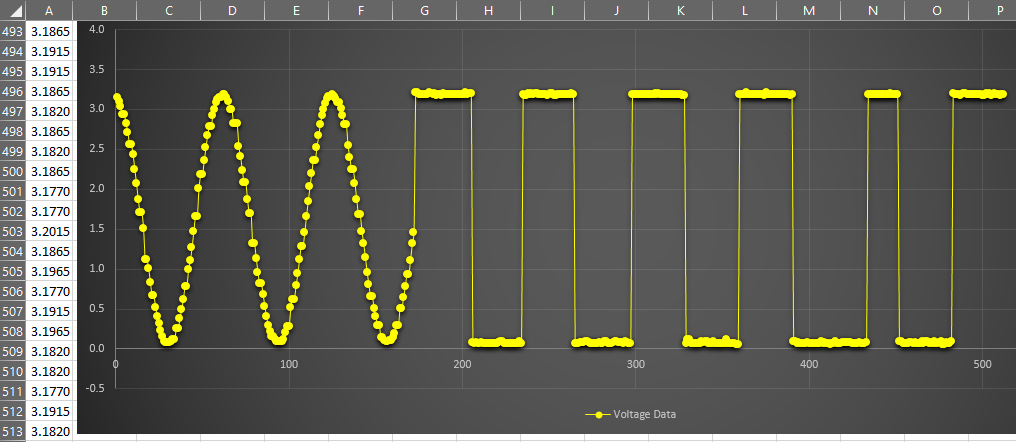
- Saved Data Support: Analyze saved signals for post-experiment review.

Example of saved data visualized in the Oscilloscope GUI.
Video Demonstration
Watch both applications in action in this short demonstration:
Getting Started
- Clone the Repository:
git clone https://github.com/salhina/serial-frequency-generator-oscilloscope.git cd serial-frequency-generator-oscilloscope - Install Dependencies
- Python 3.8+
- PyQt5
- Arduino IDE
- Run the Applications
- Open and run the Serial Frequency Generator application on your PC.
- Upload the Arduino Oscilloscope firmware to your Arduino Uno.
